Barry777
User

May 26, 2010, 1:57 AM
Post #16 of 41
(15644 views)
Shortcut
|
|
Re: [Bandit] Fisher VCR Model FVH-720 (very old) No Power
[In reply to]
|
Can't Post
|
|
Thanks for your kind comments, Bandit. My real "claim to fame" was being the top dawg of 8 track repair (Barry's 8 Track Repair) which I shut down for awhile to rekindle my passion for VCR's and just play around with stuff. I did a lot of VCR work in the 80's when they were the big thing, and before they turned into these 5 pound plastic pieces of junk. On the service manual issue , ManualUniverse.com or ServiceManuals.net are great websites. You can download and print your manual mere moments after paying online with a credit card. These two are safe; I had tried another one that ended up funneling 60 bucks of my money to some place in Moscow, but I called my bank and had the transaction cancelled. You'll generally pay between 15 and 25 bucks for a service manual download. The schematics are not usually crisp and clear and sometimes the edges are off the page, but so far I've always been able to muddle through them and get the stuff fixed.
I mostly work on JVC professional machines these days, those huge 50 pound monsters with all the cool meters, buttons and functions I'll never learn how to use. I was once a professional musician and want to record myself on video one last time before I hang up the guitar for good. My plan is to eventually sync up at least 2 recording VCR's (for 2 camera angles) with my ADAT (Alesis Digital Audio Tape) machines for 24 track audio, and produce as close to a professional video production as possible to make my friends think I got somewhere in music! It's been a several month project so far, learning how to use the needed time code equipment to synchronize video with audio, as there are 3 or 4 different time code languages, then it must be converted to a format that the ADAT machines can understand. As I'm by no means an experienced videographer, it's been quite a learning process.
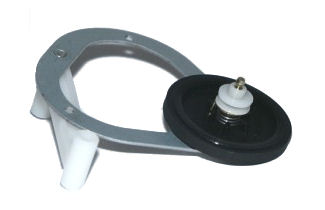
The idler tire on the Fisher FVH series is one of the more difficult ones to replace, especially if the chassis doesn't have that little half-round cutout to enable you to extract the idler assembly. It's easier if you remove the takeup reel first, but you can just jam the idler aginst the reel and only make a small and harmless flat spot on the plastic idler wheel (the cutout is a bit too close to the takeup reel). You have to peel back the tire with the idler still in the unit, in order to get it close enough to the cutout to extract it. On most older Fishers, the idler tire is very thin - smaller, in fact, than a loading belt - and wears out pretty quickly or glazes over.
If your chassis doesn't have the half-round cutout and the idler assembly seems hopelessly buried in the mechanism - well, it IS! The early Fisher front loaders were not exactly designed with serviceability in mind. But instead of taking the whole darn thing apart and hassling with getting the gears back in alignment, here's a trick that will save you hours of frustration and grief: Get one of those nibbling tools from Radio Shack, and just cut away enough steel to get that rascal out of there! Having spent many years in Heating and Cooling, I always have tin snips around, but they bend the metal too much at the angle you need to cut. I never tried the nibbling tool, but I'm sure it works much better.
Many shops wouldn't even take in Fishers for this very reason - they're too professional-minded and don't know how to Afro-engineer solutions. Replacing the idler tire the "correct" way is a ridiculous waste of time and sanity, requiring you to take the mechanism completely apart. I've never seen the service manual, but they frequently take you the long way around doing things too, when there's a much easier way with fewer steps. Generally, you follow the manual the first time, then do it your own more efficient way after that. Just like when a car manual says to remove the spark plugs when replacing the timing belt, presumably to eliminate any chance of the engine starting and messing up the crank-to-camshaft relationship. Geez, just make sure no one's in the driver seat with the key!
Good luck and thanks again - let me know if you need any more advice.
.
.
.
Barry Fone - VCR Repair hobbyist and professional FAA Repair Station Avionics Bench Technician (top level). TEST EQUIPMENT: (4) Sencore VC93 VCR Analyzers, (11) Tentel gauges, Sencore VA48 and (2) VA62 Video Analyzers, Sigma Electronics TSG-375 NTSC/SMPTE Video Generator, several VCR Alignment Tapes, plus countless Oscilloscopes, Frequency Counters, Wow and Flutter Meters, Distortion Analyzers, Vectorscope, 136-channel Logic Analyzer, Signature Analyzer . . . . VIDEO GEAR: (6) JVC BR-S822U's, (3) JVC BR-7000 series, (3) JVC BR-S500U, (2) JVC BR-S800U, JVC GR-800U and (2) GR-860U Editing Controllers, Sony FXE-100 Video Switcher/Effects Generator, (5) Time Code Generator/Readers, (1) Sony SLO-1800 (Beta), (2) Alesis ADAT-XT, (1) Sony DXC-1200 TV Camera, Pioneer VP-1000 Laser Disc Player plus many consumer grade Beta and VHS VCR's. Passionate electronics enthusiast since 1973...most anything except computers. Check out my collection at www.barrys8trackrepair.com/MyVideoGear.html
(This post was edited by Barry777 on May 26, 2010, 2:08 AM)
|