mjbxx
New User
Feb 2, 2011, 7:11 PM
Post #27 of 66
(5427 views)
Shortcut
|
|
Re: [Ron.M] Panasonic PT53WX53 geometry off
[In reply to]
|
Can't Post
|
|
Ron.M
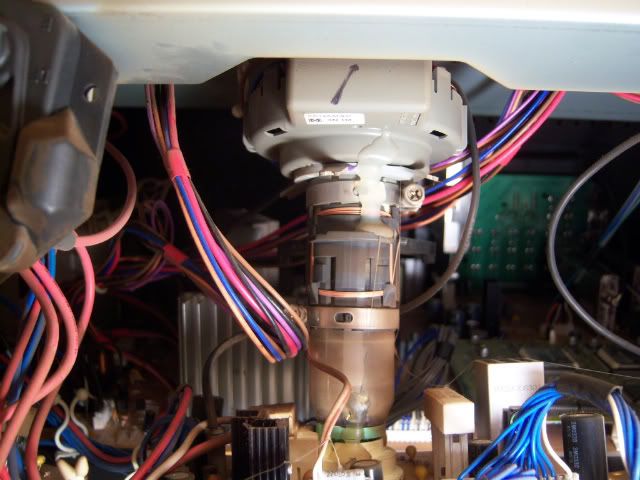
Here is the yoke set up and it looks to be similar to the Phillips. I am sure you see the adhesive strip that goes over the yoke, centering magnets, deflection screw, and neck. It looks as though I should remove the adhesive from the deflection screw downward. Leaving the adhesive on the yoke and centering magnets. This would allow for yoke adjustment without disturbing the centering magnets.
"Cover the lens (Use newspaper or a magazine etc) of the 2 colors you are NOT adjusting....
That way you'll have only the one color to adjust....
After you do one color move a cover over to the one you just completed & adjust the one where the cover came from....
Once more & you're done..."
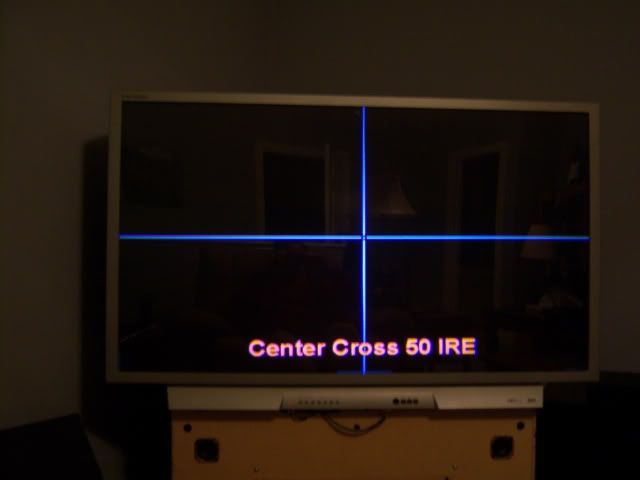
I should not have to cover any lenses as per instructions in the service manual.
Set VIDEO �C_OFF� DAC from 00 to 01 to project only green.
Set VIDEO �C_OFF� DAC from 01 to 03 to project only blue.
Set VIDEO �C_OFF� DAC from 01 to 02 to project only red.
I am wondering if I should do the Horizontal Phase Adjustment, on pages 17.1 and 17.2 which adjusts the green only in both NTSC and 1080i before I go about adjusting the yokes in the 17.3 Centering magnets adjustment.
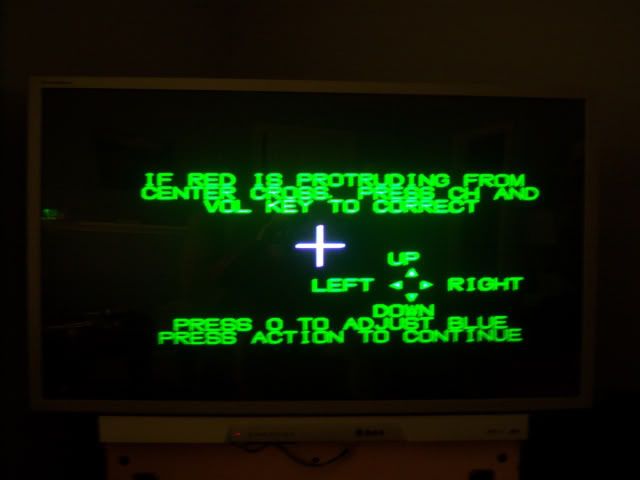
17.1 NTSC Horizontal phase adjustment (H POS)
TOP PREVIOUS NEXT
This adjustment is intended to correct the horizontal position of the picture
NOTE:
1080i, 480p, 480i pattern can be obtained from Panasonic�s TU-DST51 set-top box DTV decoder.
-
Apply a NTSC pattern that lets adjust the image to correct vertical size (see above note). -
Set VIDEO �C_OFF� DAC from 00 to 01 (to project only green). -
Set DAC MUTE from 00 to 01 (disabling digital convergence). -
Turn green deflection yoke until line is perfectly horizontal. -
Adjust �H POS� DAC data so that pattern is in the center of screen -
Enable digital convergence by changing DAC MUTE from 01 to 00. -
Set VIDEO �C_OFF� DAC from 01 to 00

17.2 HD 1080i Horizontal phase adjustment (H POS)
TOP PREVIOUS NEXT
This adjustment is intended to correct the horizontal position of the picture for HD 1080i mode.
NOTE:
1080i, 480p, 480i pattern can be obtained from Panasonic�s TU-DST51 set-top box DTV decoder.
-
Apply a HD 1080i pattern (see above note). -
Repeat NTSC horizontal phase adjustment from step 2
It appears that the 17.3 Centering magnets adjustment is done only for NTSC and does not require it be done in 1080i. Am I right here?
You mentioned earlier you have lost parts of the service manual. Here is the link, https://www.opendrive.com/..._account/account.php, for recovering it.
|


 ...
... 
 ...
...  Re: [mjbxx] Panasonic PT53WX53 geometry off
[
Re: [mjbxx] Panasonic PT53WX53 geometry off
[
 ....
.... 
 ...
...